Tiffany Ward/Getty Images
By Brad Hill/
There are a plethora of tools every person should keep in their toolbox, and a stud finder is one of the most important ones. A stud, for the uninitiated, is a board within the walls of a building that provides support. When it comes time to hang a piece of art, a mirror, or any decor from the wall, you want to use a stud as a safe anchor.
While you could knock on your walls until you no longer hear a hollow reverberation, a stud finder is the most efficient method for finding that hidden support board. It’s important to note that there are two types of stud finders. The first kind is a magnetic stud finder, which detects the nails and screws behind the wall. Electronic stud finders, on the other hand, sense a change in density within the wall.
If you’re wondering if you can use a stud finder app on your phone, the answer is yes. Stud finder apps use a magnetometer in the phone to detect metal. Many handymen prefer a density-reading stud finder, especially for more valuable projects like mounting a 65-inch TV to your wall. Once you decide on the type of stud finder you want to use, it’s time to hunt down those hidden studs and use the device. So, how do you use it?
Using your stud finder

Lee Goudy/Shutterstock
There’s nothing to be intimidated about with a stud finder. It’s an incredibly simple tool to use. In fact, it’s probably the most straightforward tool in your belt. Once you know which project you’re undertaking and know roughly where on the wall you want your project to go, grab that trusty stud finder.
1. Place your stud finder flat against the wall roughly one foot to the left where you want to hammer or drill and turn it on. Word to the wise, studs are typically 16 inches apart unless it’s an older home. In which case, they’re likely 24 inches apart.
2. Keep the finder flat against the wall and slowly slide it to the right.
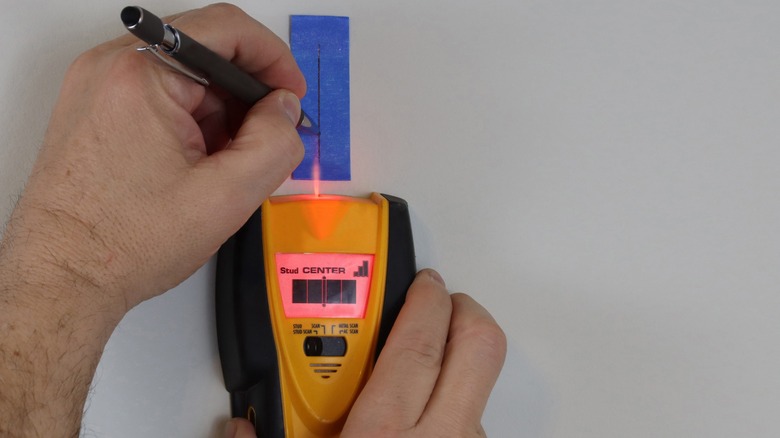
3. Once you come across a stud, the finder will alert you either with an indicator light, beep, or both. When that happens, mark the spot with a pencil. A center-finding stud finder will show the edges of the stud. Mark both edges, so you know where the center is when it’s time to hammer or drill.
4. Double-check your work so you’re confident you found a stud. A stud finder can indicate a false positive if there’s metal piping behind the wall. The best method for double-checking your work is to find the other studs. Again, newer homes place their studs 16 inches apart. If the other studs you find aren’t 16 or 24 inches apart, then the finder gave you a false positive.